All articlesInside Genera
Inside Face Lab: Where Every Genera Model Begins
The individual frames were never the problem — the drift between them was. A tab-by-tab walk through Face Lab, where every Genera model begins and stays the same person.

Every model in Genera starts in Face Lab. That sentence opens the platform’s own film about it, and it is meant literally: whether a brand casts from the numbered roster or builds an exclusive face of its own, the identity that will later carry a whole catalogue begins in this one panel — seven tabs across the top: Create, Edit, Makeup, Tone, Refine, Body, Shot.
The film below is the ninety-second version. The rest of this article is the slow one — tab by tab, control by control — because the controls are where the argument lives. Nearly every one of them answers the same question: how do you make a generated model behave like a hired one?
1. Create — casting, not prompting
A new face starts from references, from a written description, or from both at once. The references are the interesting part, because this is not a mood board, where everything contributes a little atmosphere. Each reference carries a tag for what you want out of it — the lips and eyes from one, the nose from another, the haircut from a third. The panel titles the list “What each one is for”, which is the whole philosophy in five words.
A reference here is an instruction, not an atmosphere.
The prompt underneath handles the rest of the person — “face, hair, skin, expression, and anything for the picture as a whole”, as the field’s own placeholder puts it. It does not need much: the session in the film runs on five words, a nationality and a haircut. Choose the engine and the grid, and a single run returns nine candidates.
Nine at once matters more than it sounds. One face is a verdict — accept it or roll again, with nothing to compare it against. Nine faces from one brief are a casting sheet: the same instructions interpreted nine ways, side by side, under the same light. Choosing between them is a casting decision rather than a gamble. Keep the one you want and it opens at full resolution — named, numbered and saved to the rail on the left, where this one becomes Woman 59.
2. Edit — local, and kept
From there everything stays editable — editable in the retoucher’s sense, not the slot-machine sense. The Edit tab is a brush before it is anything else: paint over the part of the face you mean, and the prompt narrows with you, asking only what belongs in the painted area. Paint over the eyes and name the colour — brown, blue, back again — and each answer is a new version, not a replacement.
That last part is the tab’s real feature. Every version is kept as you go, stacking in the left rail like a contact sheet, so trying something costs nothing and changing your mind costs less. The brush itself has size, opacity and softness — the vocabulary of retouching software, pointed at generation.
Hair, lips, and the shape of a nose all work the same way: select the area, say the change, compare the versions, keep the one that earns it. The identity is never re-rolled to change one feature — which is precisely the failure this tab exists to avoid.
3. Makeup — a reference, not an adjective
Makeup is where prompting fails fastest. “Soft smoky eye with a graphic flick” means five different things to five make-up artists, and something between all five to a generative model. So the Makeup tab does not ask for adjectives; it asks for a picture.
References collect in two racks — Brought in, for images you add, and From other shoots, for looks that already exist in your account. The film’s example is a graphic liner lifted from a runway photograph: the photograph is the reference, one press of Apply makeup, and the liner is on the model — redrawn for her eye shape and her light, not pasted across them. Swap the reference and the makeup swaps with it, a smoky grey replacing the flick in one move.
The consequence for production is that a beauty look becomes an asset rather than a description. The picture that defines it can be filed, reused and applied to the next face in the cast — and it lands the way a brief lands, not the way an adjective drifts.
4. Tone — complexion, by contract
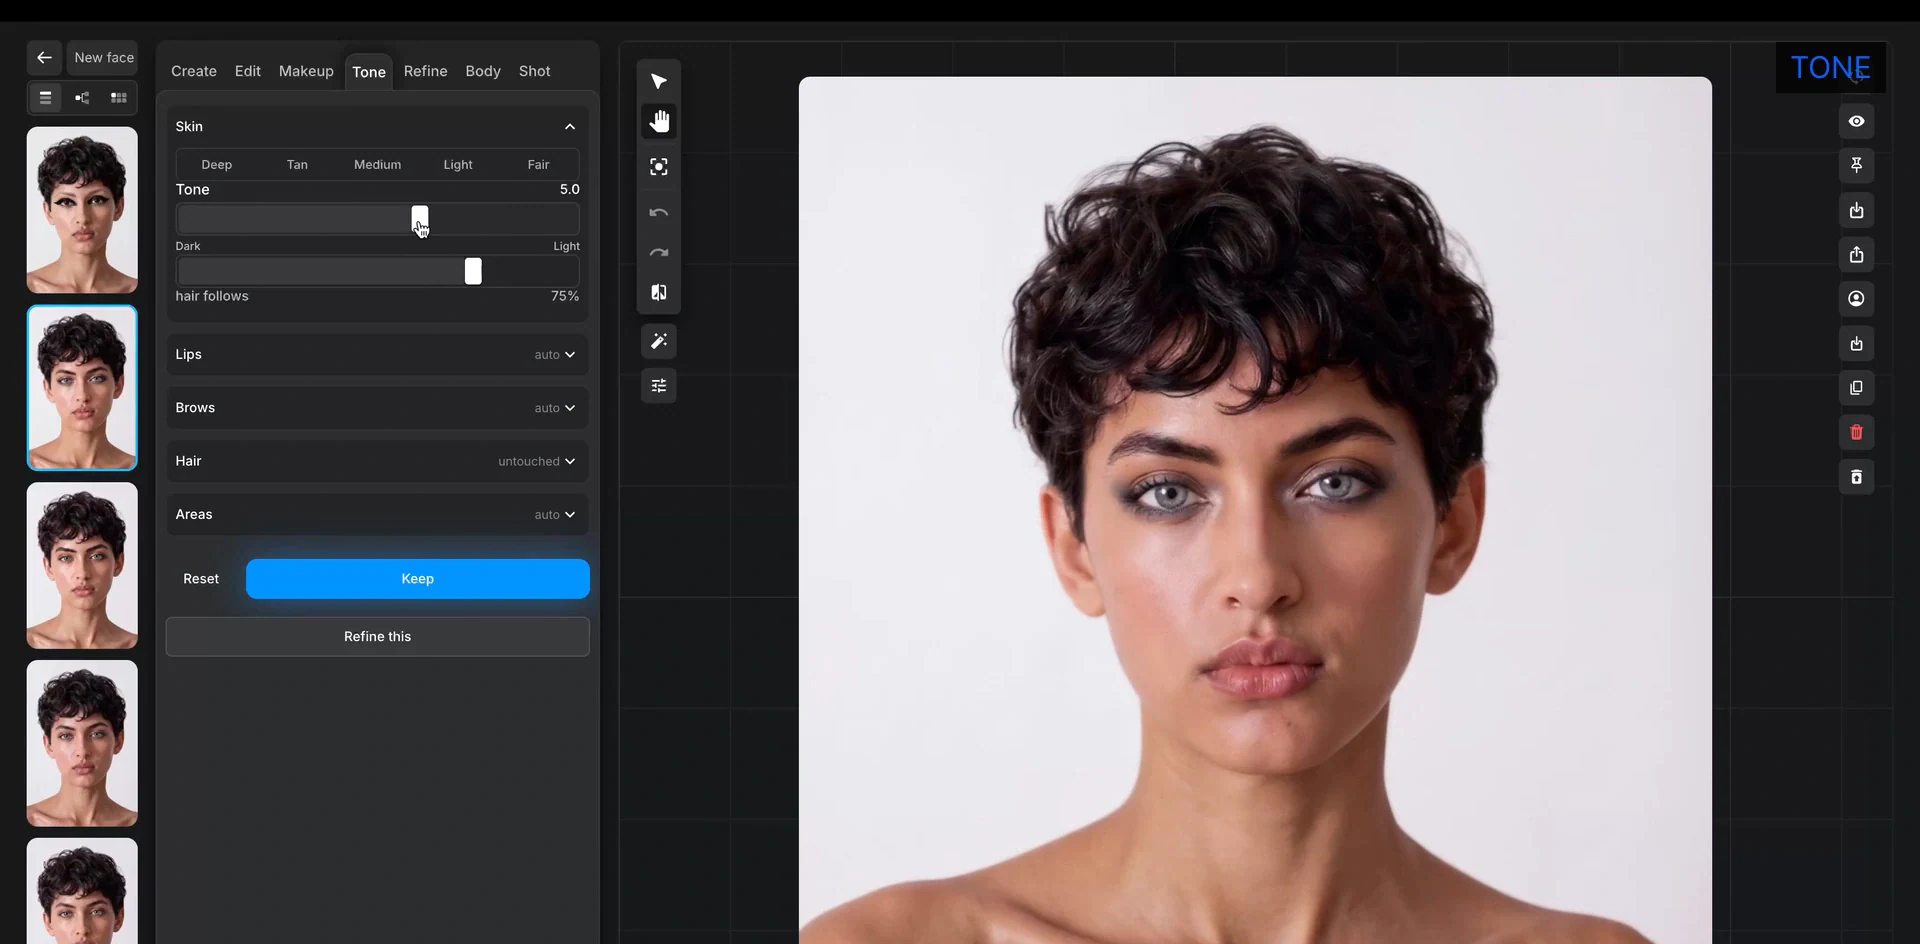
Skin runs on a five-step scale — Deep, Tan, Medium, Light, Fair — with a numeric tone slider running dark to light underneath it. “Hair follows” is a percentage: how much the hair colour shifts along with the skin, so a lightened complexion does not leave the hair stranded. Lips and Brows are set to auto by default, tracking the skin unless you say otherwise. Hair is set to untouched, the explicit opposite — lock it and it stays. Areas gives regional control, for when the change should not be uniform across the face.
Every change is provisional until you press Keep, with Reset alongside it. And at the bottom of the panel sits a second button that quietly admits the tab’s limitation: “Refine this”.
5. Refine — the reconciler
Refine is the least glamorous tab and probably the most necessary. Every preceding step is a local intervention: new eyes here, new liner there, a lighter complexion. Each is correct on its own and slightly wrong together — the light no longer quite agrees with the skin, the edges of an edit sit a little too crisply against the rest.
Refine redraws the whole image to make it agree with itself. Its instruction is written out in an editable field, and it reads like a brief handed to a retoucher: “Redraw this image so that it becomes realistic, but keep the facial features, the composition, the lighting, the skin tone and the hair colour.”
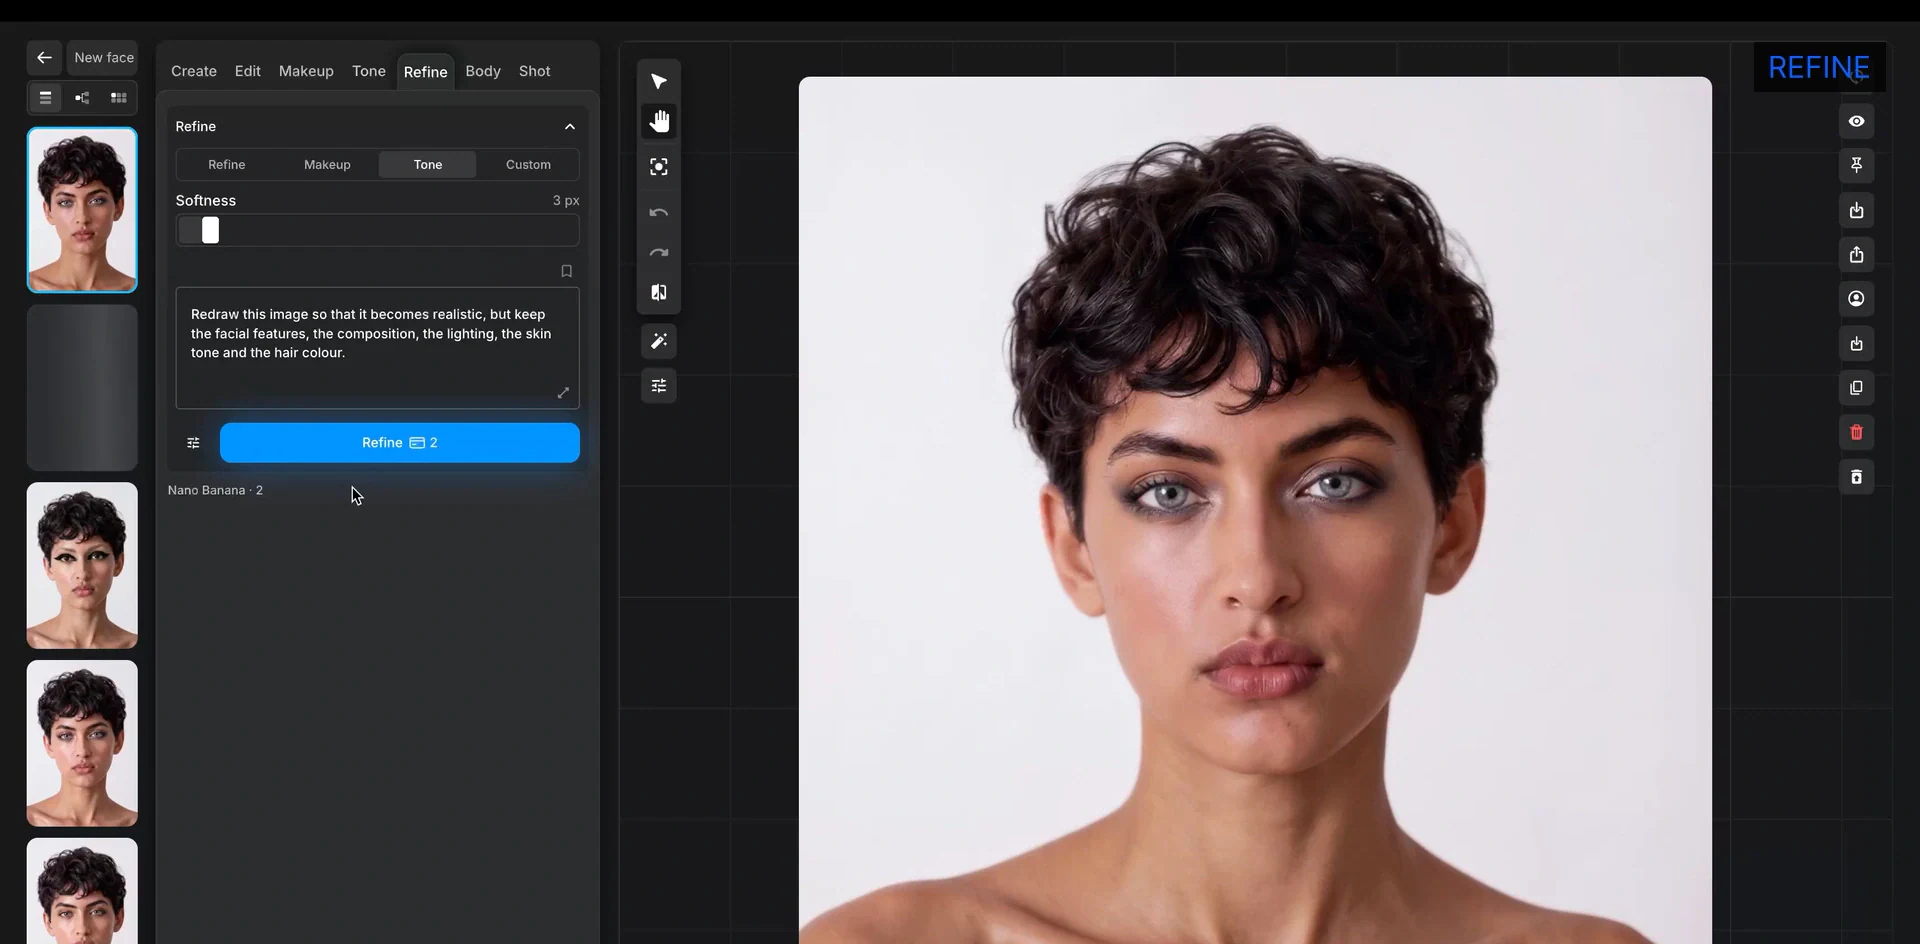
A softness value controls how far the pass reaches. Sub-tabs let you aim it at a particular layer — the makeup, the tone — or write your own instruction entirely. It is, in effect, an undo for accumulated inconsistency.
6. Body — figure
The body starts as a sentence. Two words — “tall athletic” — and the canvas answers with a full-length figure in plain white underwear on a seamless backdrop, ready to be dressed.
The panel’s own note about where that body comes from is one of the more revealing lines in the product: “Each run uses the next of the bodies of the very people this face was cast from, so runs differ by their reference as well as by chance.” The body is not invented to match the face. It is drawn from the same source people the face was cast from — which is why running it again gives you a genuinely different physique rather than a variation on the last one.
Once a build exists, prose gives way to direct control. A Shape panel opens with the proportions grouped the way a pattern cutter would group them: whole body (height, legs, build, muscle), upper (shoulders, chest, arms, neck, head), lower (waist, hips). Drag height toward taller and the figure lengthens on the canvas; the skeleton beneath it is visible as a rig of joints, and the proportions follow it. A companion Points tab exposes those joints directly. As in Tone, the state is provisional until you press Keep.
7. Wardrobe and Shot — dressing and camera
The wardrobe is not a texture library. It is a rack of specific garments, each one a real product photographed on white: wide leg jeans, white. Leather sneakers, white. Woven shoulder bag, brown. Alongside them sit items still carrying their catalogue filenames — knitwear 004 marni striped pointelle knit cashmere, pants 009 dolce gabbana 5 pocket denim trousers — which tells you plainly where the rack is filled from. You assemble a look by picking a top, a bottom, shoes, a bag.
The same panel then defines the photograph, in the vocabulary of a shot list rather than a render setting. Shot: full-body, midshot, closeup. Angle: front, 3/4, profile, back. Motion: static or dynamic. Shots can be named and saved; saved shots collect into lookbooks. A preset is therefore not a one-off setting but a reusable specification — midshot · 3/4 · dynamic — that any garment can be run through later.
The final detail reframes everything before it. In the Shot tab, the face is not a single portrait. Faces are held as a lettered cast — A, B, C — each with its own body attached, and you choose which one wears the look. So the unit of work is not an image. It is a roster of models who can each be sent through the same wardrobe and the same shot list, and come back consistent.
What it amounts to
Read as a whole, Face Lab is an argument about where generative imagery actually breaks in commercial use. Not at quality — the individual frames are convincing. It breaks at continuity: the model drifts between shots, the skin shifts, the proportions wander, and a product page stops looking like a shoot.
Almost every design decision here answers that. References carry tags so a face is composed deliberately rather than averaged. Nine candidates arrive at once so choosing is a casting decision. Edits are local and versioned so nothing is lost by trying. Refine exists purely to keep accumulated changes coherent. Bodies are attached to faces, faces are lettered into a cast, garments are real products, and camera setups are saved as reusable specifications.
Generating a face is easy. Generating the same face twice is the product. The pitch is not “we can make a beautiful model” — it is “we can make her the same on Tuesday”.
FAQ
02- What is Face Lab?
- The tab where every Genera model begins. It builds a new AI fashion model from reference images, a written description, or both — nine candidates per run — and then carries the kept face through editing, makeup, tone, body and shot without losing the identity.
- Can I control which features come from which reference?
- Yes. Each reference carries a tag for what it contributes — the lips and eyes from one, the nose from another, the haircut from a third. A reference is an instruction rather than a mood, so the face is composed deliberately instead of averaged.
- What happens to earlier versions when I edit the face?
- Nothing is overwritten. Every change — an eye colour, a new liner, a lighter skin tone — is kept as a version in the session rail, and tone and body changes stay provisional until Keep is pressed, with Reset alongside.
- Where does the model's body come from?
- Each build draws on the bodies of the same source people the face was cast from, rather than being invented to match the face — which is why re-running returns a genuinely different physique. From the first build, sliders take over — height, legs, shoulders, waist — grouped the way a pattern cutter would group them.
- How does one face become a whole cast?
- Faces are held as a lettered cast — A, B, C — each with its own body attached. A garment and a saved shot specification can be run across every member, so one look comes back as consistent full-body, midshot and close-up frames for each model.


