All articlesInside Genera
Inside the Genera Enhancer: From Generated to Retail-Ready
Noise, blotchy patches and waxy skin are how an AI image gives itself away. The enhancer removes them at native resolution, then upscales the clean result for export.

This cover is one pass of the Genera Enhancer — sharp to the strandHover to inspect at 100%
Every image a fashion brand publishes gets inspected at a distance its photographer never intended: fingers-on-glass zoom, on a phone, by a customer deciding whether the knit is worth the price. Generated imagery has to survive that inspection the same as a shot from a studio — and what stops it is rarely the garment or the model. It is the residue of generation itself: noise riding on skin, blotchy patches in the backdrop, texture that goes waxy where the model hesitated. The enhancer built into Genera exists to remove exactly that residue, and this is how it works.
The artefacts that give an image away
A generative model does not record light; it reconstructs an image from what it knows, and the reconstruction leaves fingerprints. They cluster in predictable places. Skin carries a fine, uniform grain that no camera sensor produces. Flat fields — a seamless backdrop, a dark knit — develop soft blotches where the model filled space. Hair and fabric weave, the highest-frequency detail in a fashion image, smear into suggestion rather than strands.
None of this matters at feed size, which is how it slips through review. All of it matters at PDP zoom, which is where the customer lives. An image that reads as photography at 100% is the bar — we hold our fitting photography to it, and the enhancer is what holds the generated side of the catalogue to it.
Enhance: cleanup at native resolution
Enhance is the second tab of four — Edit, Enhance, Upscale, Review — and it does one job: it removes generation artefacts, the blotchy patches and noise other tools leave behind, at the photo’s original resolution. Nothing is resized, nothing is reframed. The pixels you approved in editing are the pixels that get cleaned.
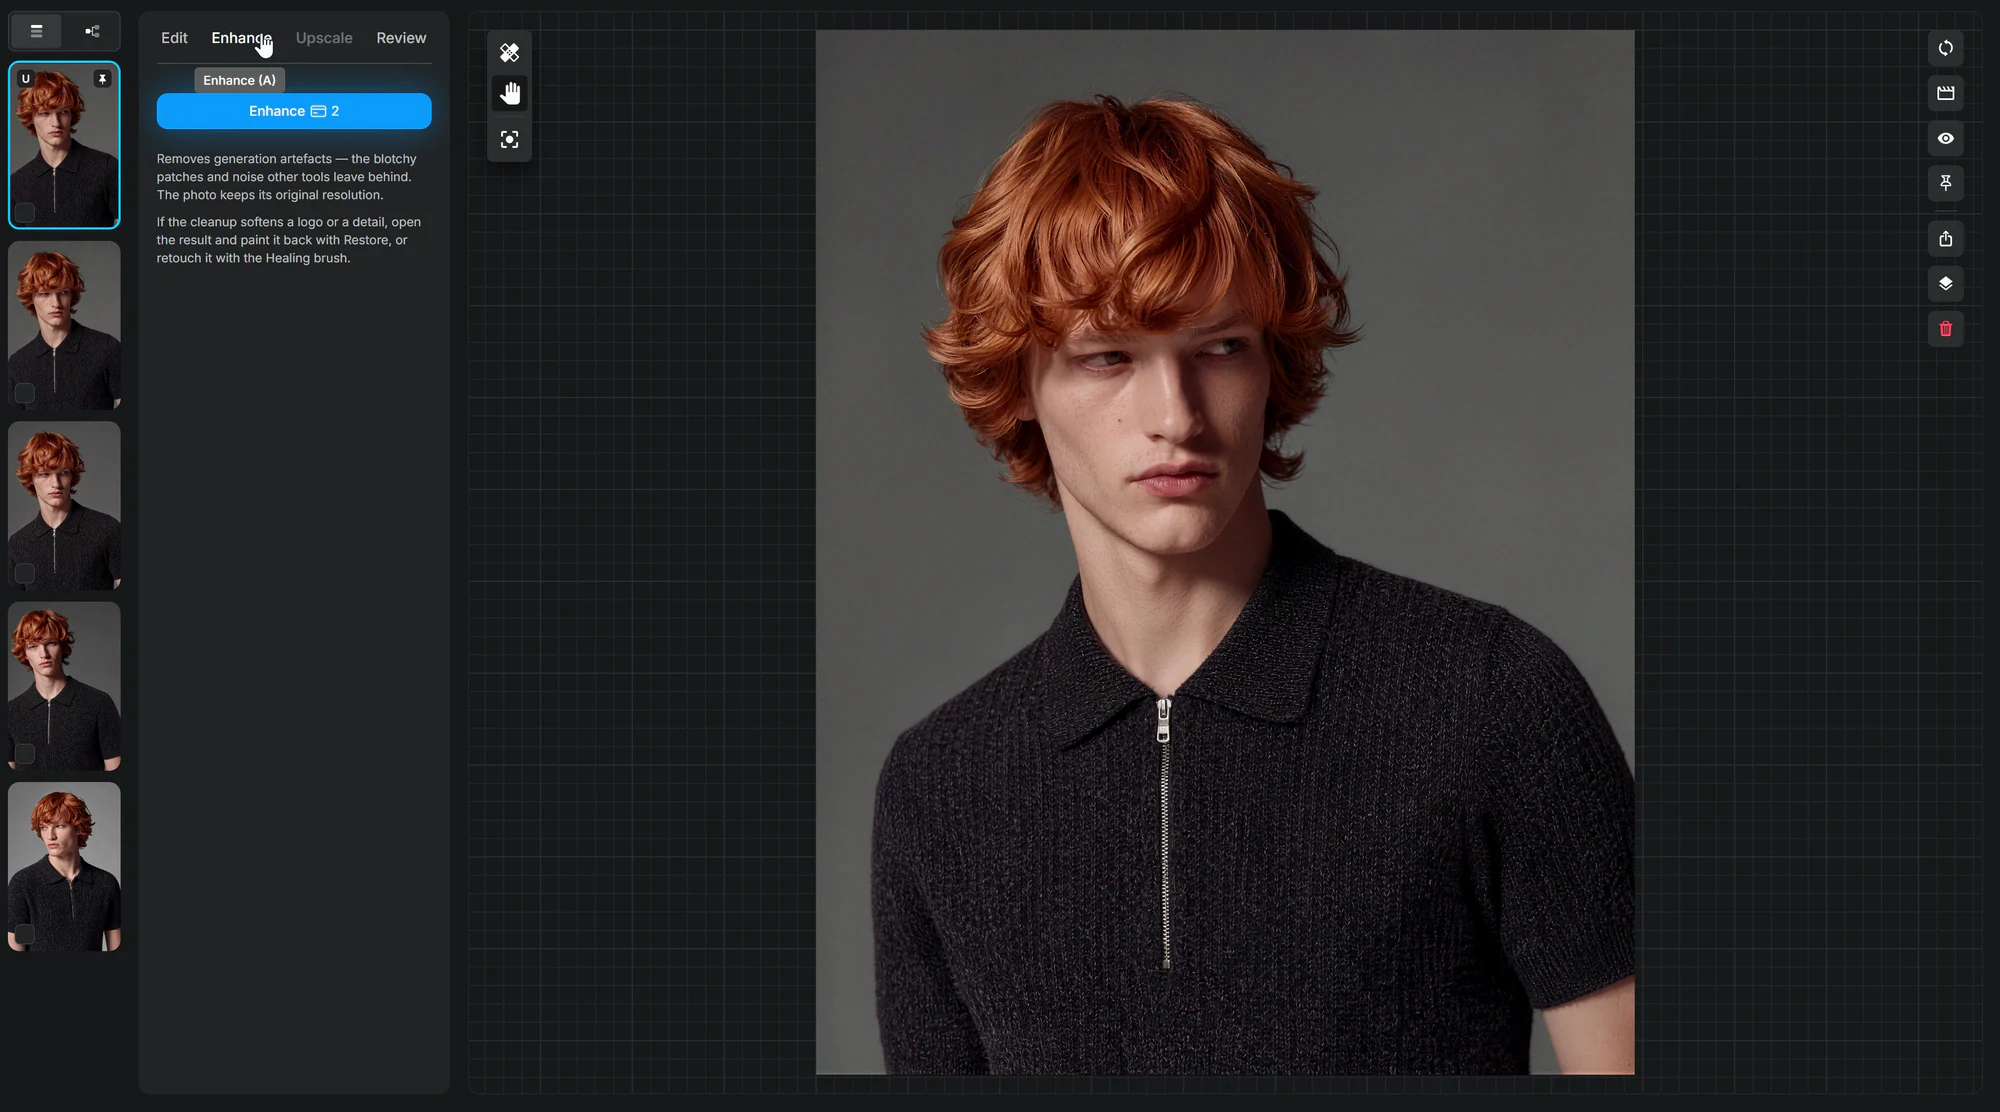
The interface is deliberately spare — one button, costing two credits, against the ten a full upscale costs. There are no strength sliders to argue about, because the correct amount of generation artefact in a commercial image is zero.
One honesty note, printed in the panel itself: a cleanup this thorough can occasionally soften a logo or a fine detail it mistook for noise. The fix ships alongside — open the result and paint the original pixels back with Restore, or retouch the area with the Healing brush. The enhancer errs on the side of clean and hands you the brush, rather than erring on the side of cautious and handing you the noise.
Look before you scale
Between the two credit buttons sits the discipline that actually decides the output quality: inspection. The editor pans and zooms to true 100%, and that is where an enhanced image should be read — eyes, hairline, and whatever the garment’s hardest surface is. On a zip-through knit polo, that means the zip.
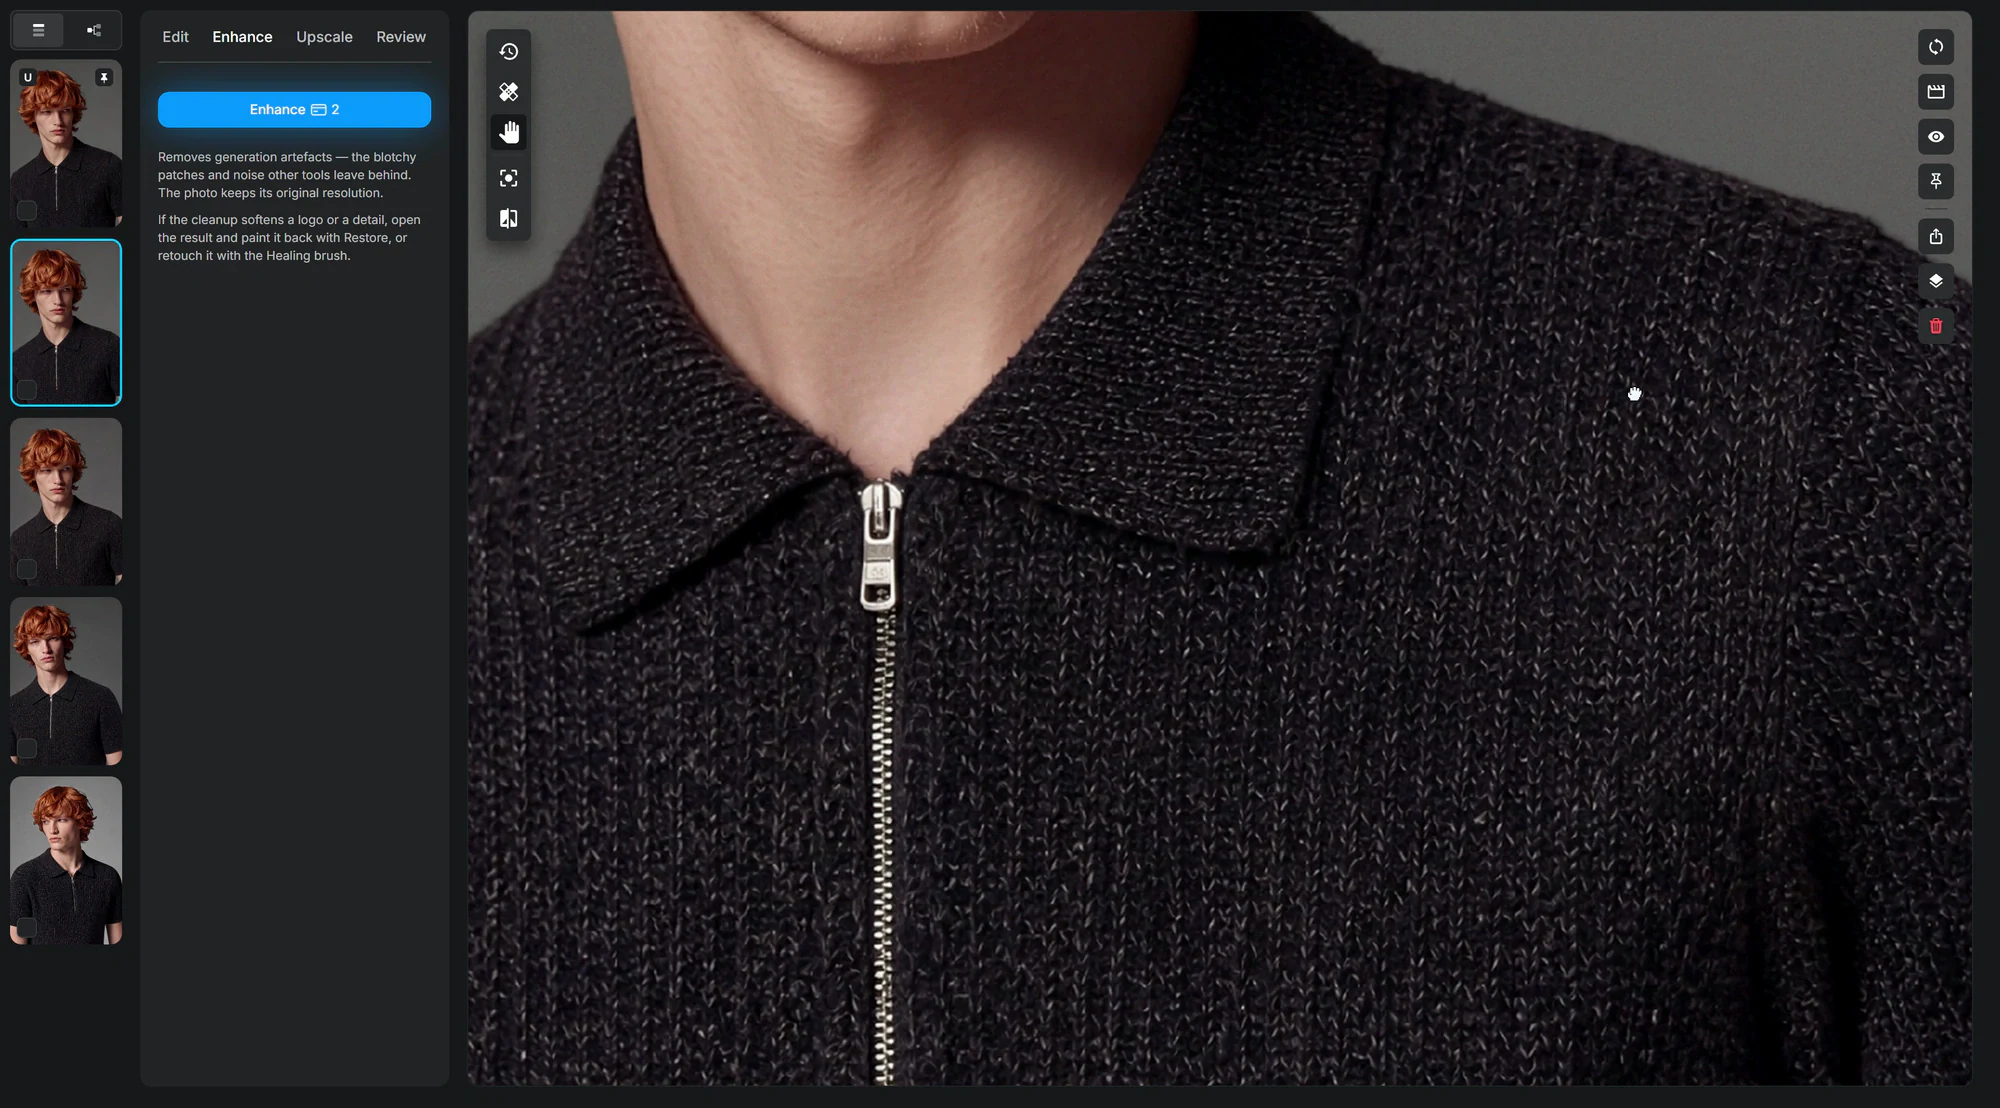
Upscaling multiplies whatever it is given — artefacts included. Clean first, scale second.
That line is the reason the tabs sit in the order they do. An upscaler pointed at a noisy image produces bigger noise, rendered in more pixels and harder to remove. Genera locks the workflow the other way round: artefacts come out at native resolution, the result gets inspected, and only a clean image is worth multiplying.
Upscale: the export master
Upscale is the final production step, and the panel says so in plain terms: once the upscale is complete, the photo cannot be edited further — only exported. That is not a limitation so much as a definition. The upscaled file is the export master, the thing you hand to the PDP, the marketplace listing or the print vendor, not a working file you keep pushing pixels around.
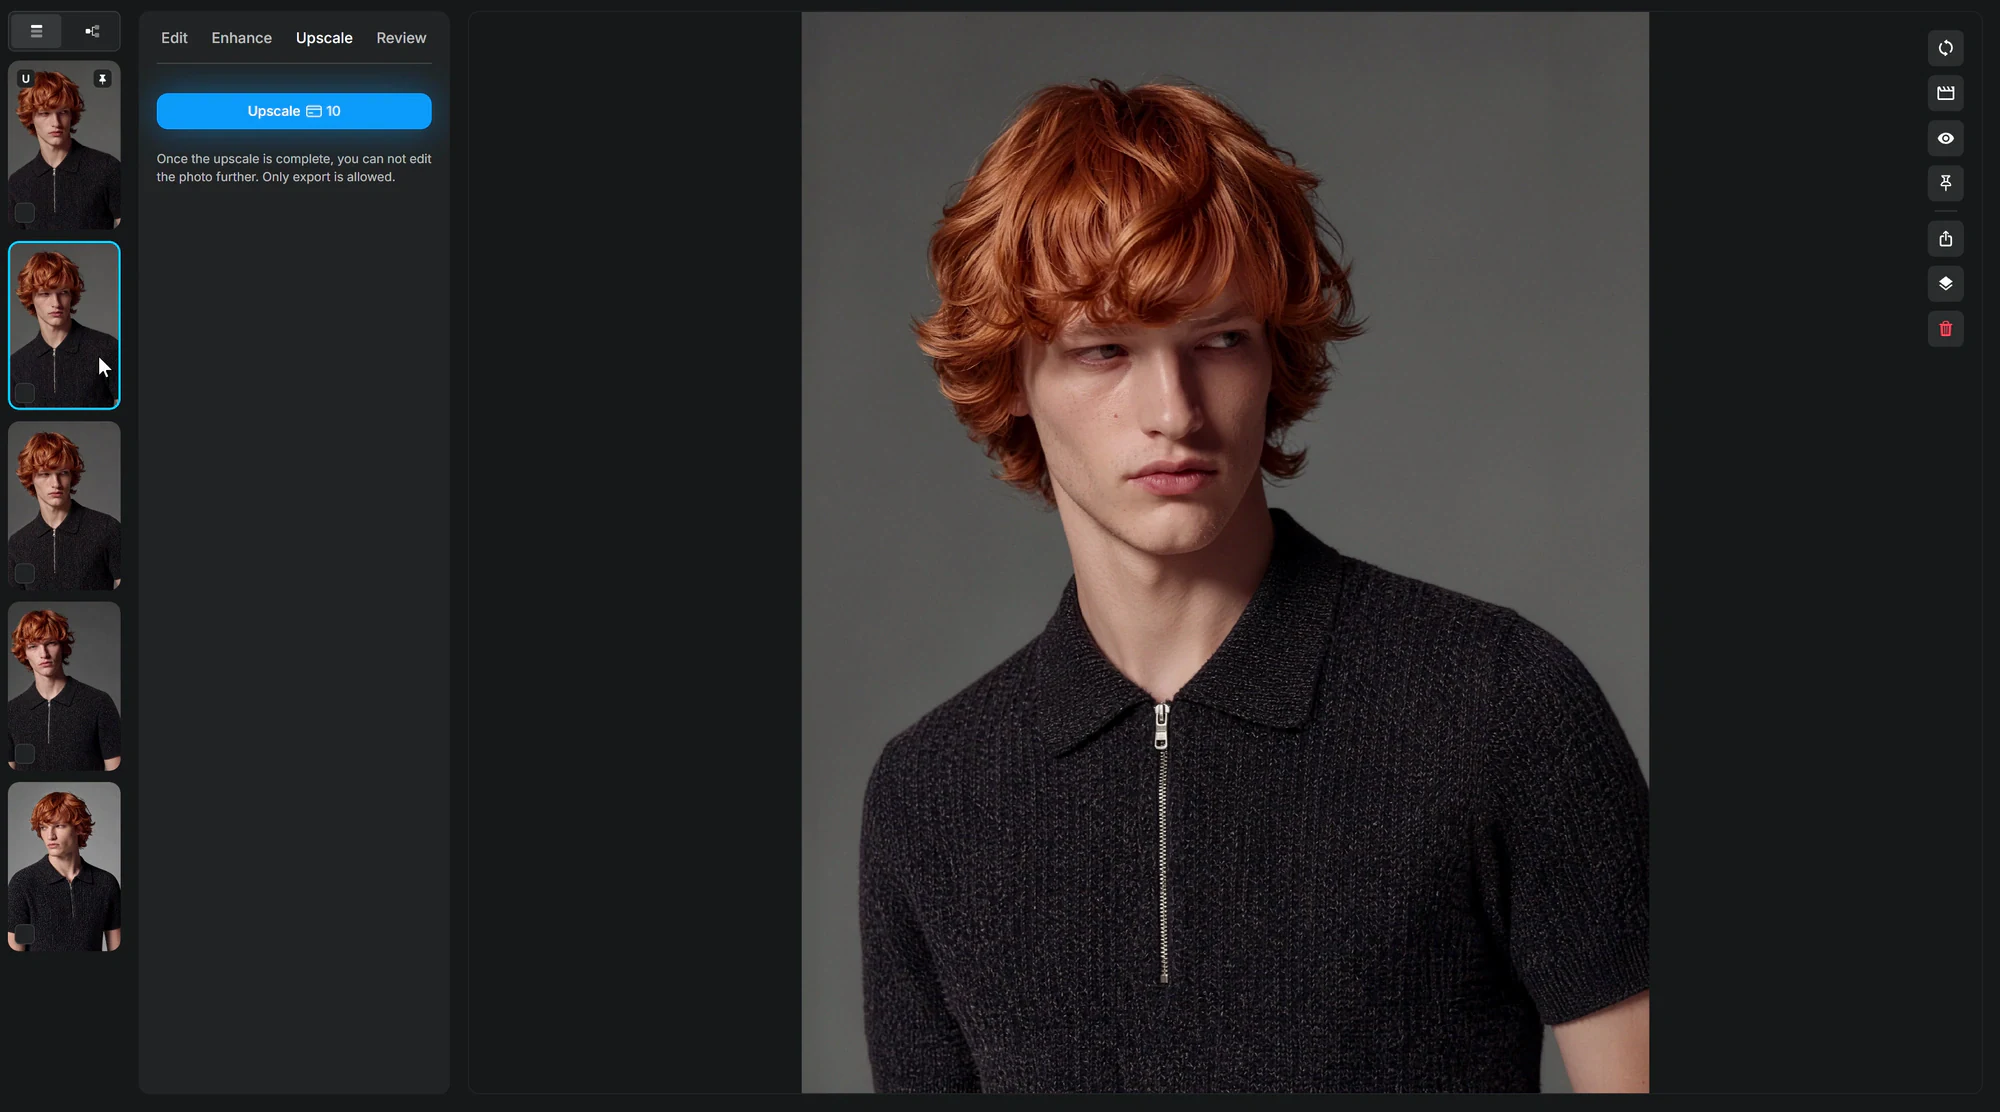
The practical consequence: everything you want to change — the crop, the retouch, the restored logo — happens before this button. The workflow makes the right order the only order, which is what a production tool owes a team that ships hundreds of images a drop.
Review: approval happens next to the pixels
The fourth tab is where the image meets the rest of the team. Review puts a draggable slider across the frame — original on one side, result on the other — and a comment layer directly on the image: click anywhere, write, and the discussion happens on the pixels it is about, not in a chat thread three tools away.
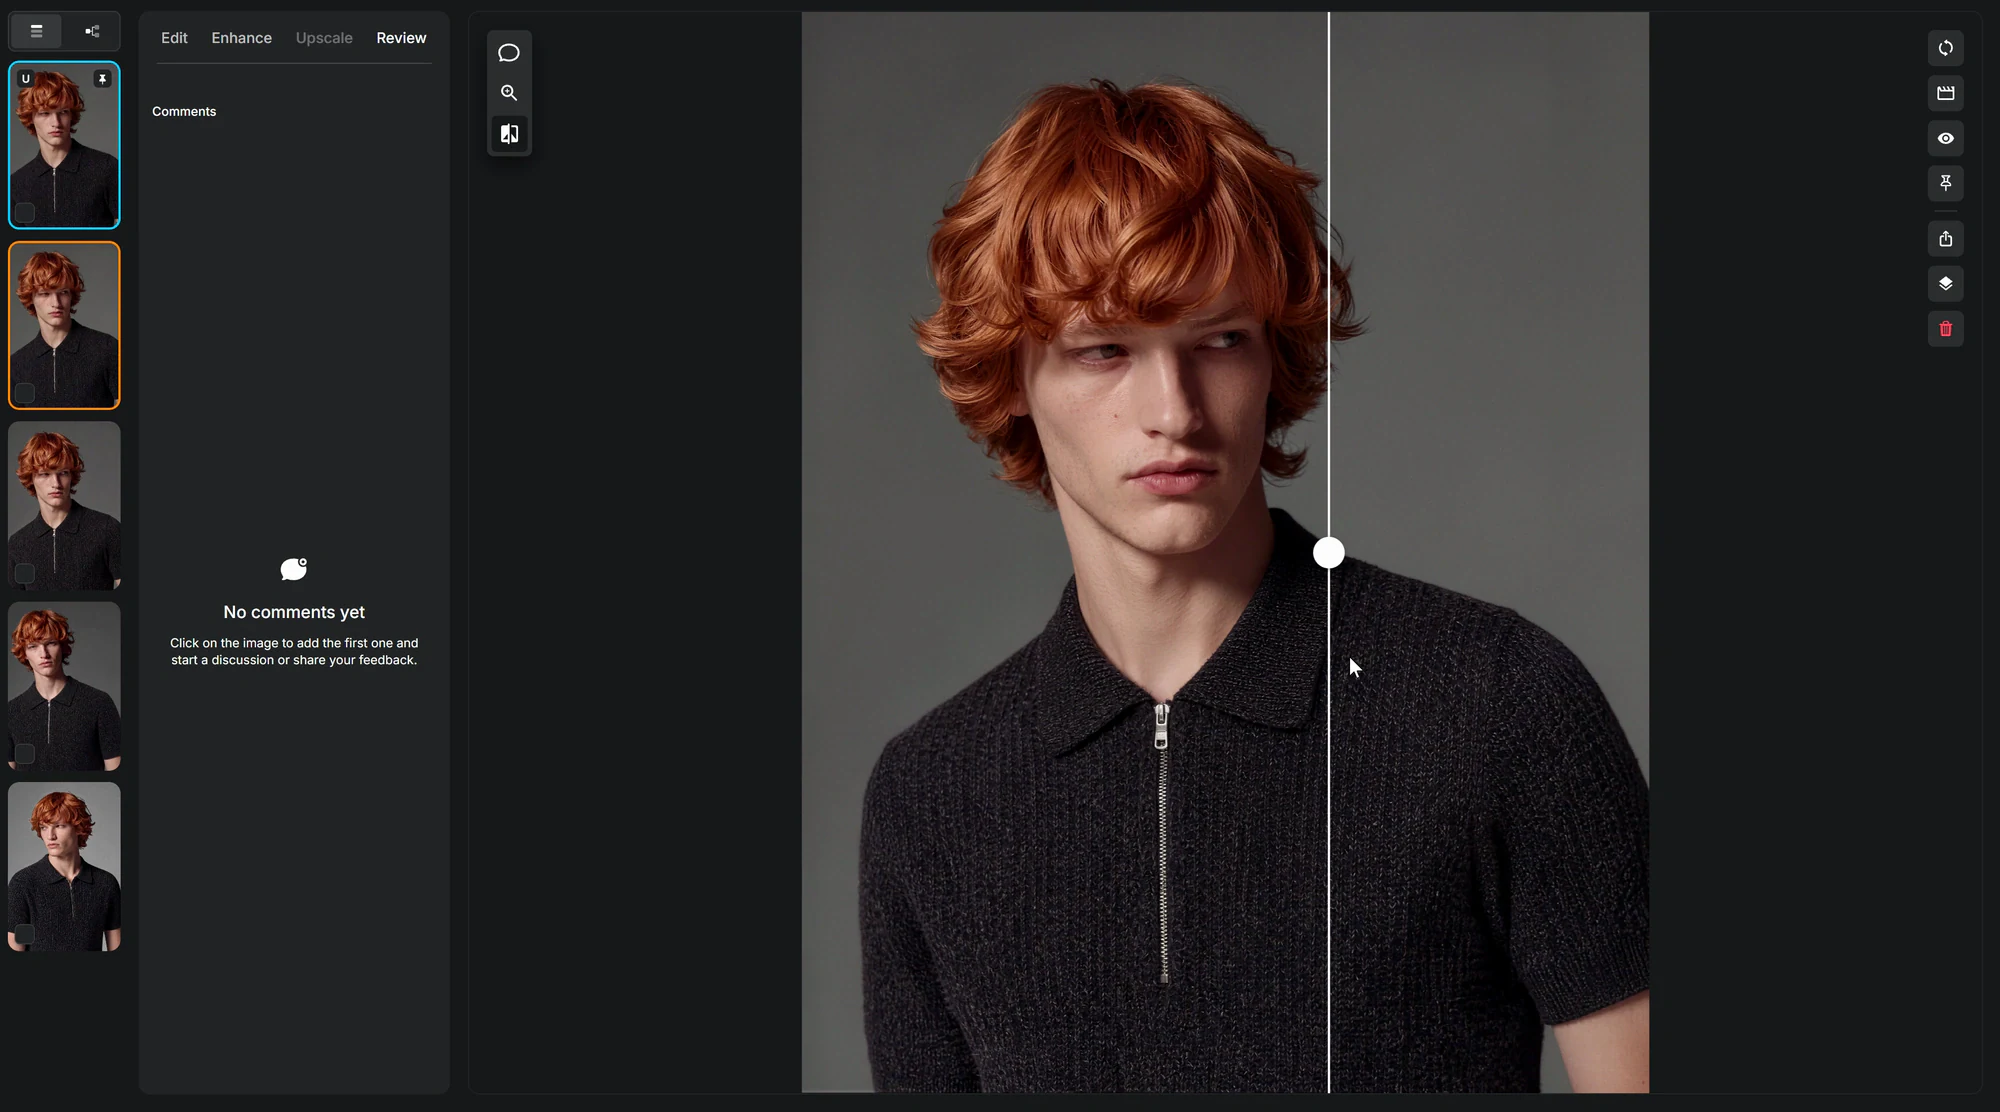
For a solo operator this is a checking instrument. For a brand team it is the approval step — the art director drags the slider, drops a comment on the one strand of hair that needs the Healing brush, and the image goes back one tab instead of back one week.
The whole pass, end to end
- Generate and edit. The image is composed, the garment approved, the crop set — the AI photoshoot up to its last working file.
- Enhance. One pass, two credits. Generation artefacts come out; resolution stays put.
- Inspect at 100%. Eyes, hairline, hardware, logo. Restore or heal anything the cleanup touched.
- Upscale. Ten credits, once, at the end. The output is final and export-only by design.
- Review and export. Slider for the before-and-after, comments for the team, export for the channel.
The enhancer is not a separate product and not a separate bill — it is the last mile of the same platform that generated the image, priced in the same credits as everything else on the plan. Which is the point. The tools that leave artefacts behind treat cleanup as someone else’s problem; a production platform treats it as the step before shipping, because that is what it is.
FAQ
02- What are generation artefacts, and why do AI images have them?
- Generative models reconstruct an image rather than record one, and the reconstruction leaves traces — high-frequency noise on skin, blotchy patches in flat colour, texture that goes soft where the model was unsure. They are often invisible at feed size and obvious at product-page zoom, which is exactly where a customer inspects a garment.
- Does enhancing change the resolution of the image?
- No. Enhance works at the photo's native resolution — it removes noise and artefacts without resizing anything. Upscale is the separate, deliberate step that increases resolution, and it comes after the image is clean.
- What if the cleanup softens a logo or a fine detail?
- The enhancer errs on the side of clean, so a small logo or an embossed detail can occasionally come out softer than the garment needs. The fix is built in — paint the original pixels back with Restore, or retouch the area with the Healing brush, and run the export from there.
- Why is Upscale the last step rather than the first?
- Upscaling multiplies every pixel it is given, artefacts included — scale a noisy image and you get bigger noise. Genera locks the order the other way round. Clean first at native resolution, inspect, and only then upscale. Once the upscale is complete the photo is final and export is the only remaining action.
- Can I compare the enhanced image against the original before exporting?
- Yes. The Review tab puts a draggable slider across the image, original on one side and the enhanced result on the other, and lets anyone on the team drop comments directly on the pixels — approval happens next to the image, not in a chat thread.


